The Fujifilm X-E3 is the latest version of Fuji’s X-E series of compact interchangeable lens cameras. The X-E series is the more budget friendly option in Fuji’s rangefinder-like line of cameras. Above it is the flagship Fujifilm X-Pro2.
The X-E3 is probably one of my favorite cameras in the entire Fujifilm lineup. Although the latest Fuji X-H1 is starting to grow on me, from a features stand-point, the X-E3 is the one that’s been most interesting to me, largely because it is such a small and light camera. Although it comes in at a lower price point than the top-end models like the X-T2 and X-H1, the X-E3 uses the exact same sensor as these models, so image quality is similar.
If you’re looking to pimp your X-E3 a little, you’ve come to the right place. Scroll below as we take a look at some must-have accessories for your Fujifilm X-E3.
Contents
Grips and half-cases
One of the biggest changes on the Fuji X-E3 (vs the X-E2s or X-E2) is the more compact size. In fact, without a lens, the X-E3 is noticeably smaller in the hand vs the Fuji X100F. Unless you have small hands, buying some sort of grip is almost a requirement for the X-E3. This is not only for comfort during all-day shooting or while using larger lenses, but for that extra hand-holding security as well. Fortunately, you have quite a few options here.
Lensmate thumb grip
Slotting onto the hot shoe, a thumb grip is one accessory I always get for Fuji’s rangefinder-styled bodies. And there really is only one name here – Lensmate. The guys and gals at Lensmate have been making high quality metal thumb rests since the original Fuji X100 and X-Pr01. They know what they’re doing, and they always come out with high quality stuff.
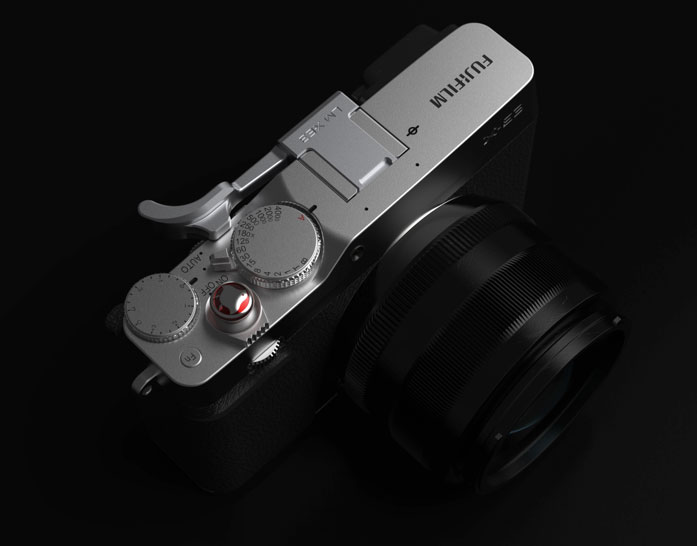
Always a must-have. A great thumb rest greatly improves camera handling without adding a lot of bulk.
Lensmate designs and manufacture camera-specific thumb grips. Unlike cheaper knock offs who take one design and repackage it for different cameras, each Lensmate design is custom-designed and engineered for the exact tolerances of your camera model. This is why the official Lensmate thumb grip for the X-E3 does not fit the older X-E2 or X-E2s, because the X-E3 is 8mm narrower and 1mm shorter than the X-E2.
The Lensmate thumb grip for the X-E3 is machined from aircraft-grade aluminum and is available in black or silver.
Do you really need one?
In my opinion, yes. If you can only get one thing to improve ergonomics on the X-E3, get this thumb grip, instead of a hand grip (see below). Although ideally, I’d prefer having both this thumb grip AND a hand grip, especially when using slightly larger lenses like the 23mm f/1.4 or the 56mm f/1.2. or for all-day street shooting.
It’s not just about added comfort too, having a thumb grip with the ideal length like this one (i.e. one designed specifically for the X-E3) will keep you from accidentally hitting buttons (like the AF-L and Q buttons) and will make one-handed operation much easier. Best of all, it’s able to do all that without adding a lot of bulk to the camera.
In keeping with the usual Lensmate quality, the thumb rest includes silicone inserts for added comfort, and as a bumper against the camera body. There is also a silicone insert on the hot shoe itself, to help prevent accidental ejection.
Click here to get the Lensmate thumb grip on Amazon.
Hand grips and half-cases
The splurge: The Fuji MHG-XE3 grip
First up, is the official grip from Fujifilm. The newer generation grips made by Fuji are called MHG-something. MHG stands for ‘metal hand grip’. 😉 Milled from a block of aluminum, the Fujifilm MHG-XE3 attaches to the base of the camera via the tripod screw and provides a very nice rubbery grip that instantly improves handling of the camera.
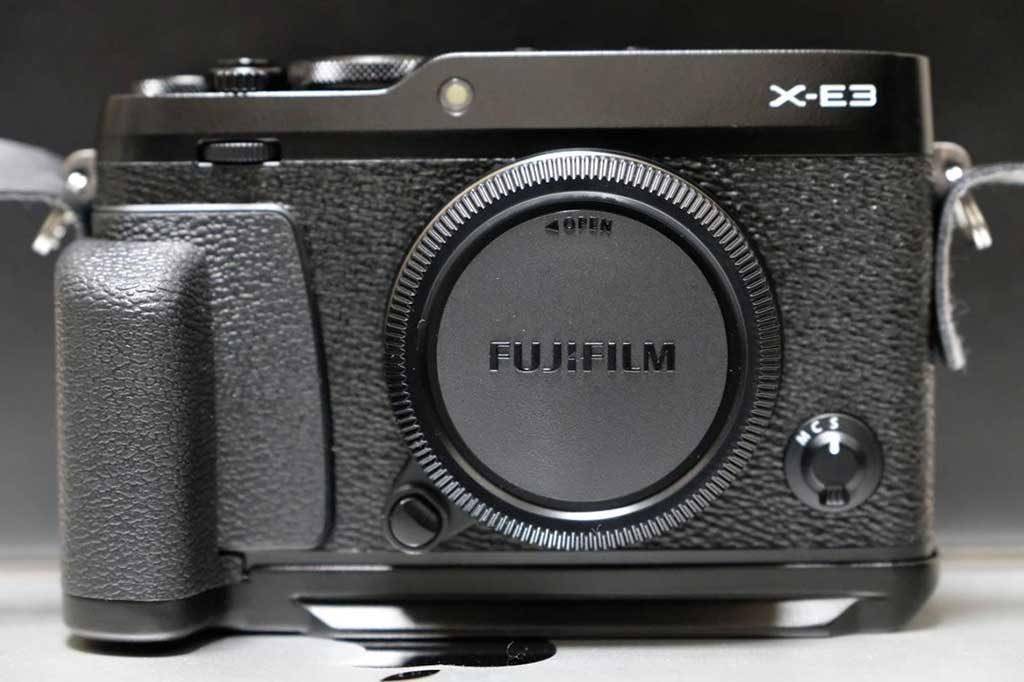
The official Fuji handgrip is a perfect match to the camera. Even the look and feel of the materials are a perfect match.
Fit and finish is perfect. Not only does it feel like part of the camera when attached, but materials and aesthetics are a perfect match for the body. Aside from the rubbery grip, this is the biggest advantage of the official grip vs third-party ones.
The bottom of the grip has a rectangular cut-out, allowing you to replace batteries and remove the memory card without needing to remove the grip. Removing memory cards is a bit fiddly, but it’s still better than needing to take the grip off.
It’s quite expensive for a grip, but it also makes two other improvements to the X-E3. First, it fixes one of the biggest annoyances of the X-E3 – the location of the on-camera tripod mount. The grip provides a new tripod mount that is now perfectly centered and aligned with the lens.
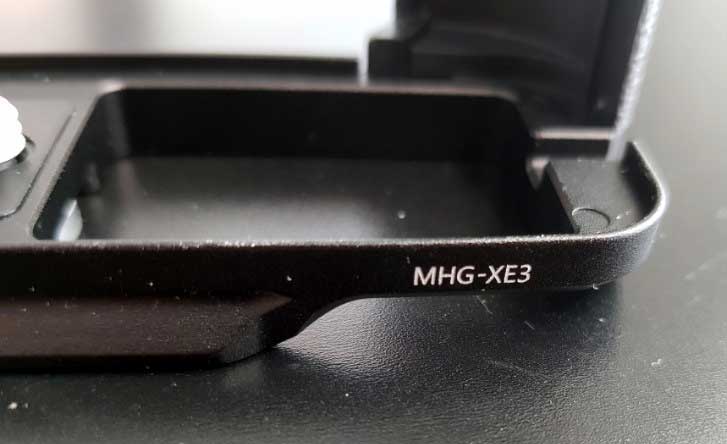
A closer look at the cut-out at the bottom of the grip, for access to the battery and memory card compartment. To the lower left, you can see the wider portion which doubles as an Arca-Swiss compatible quick release plate.
The second improvement, and one that almost justifies the cost of the grip, is the addition of a built-in Arca-swiss compatible quick release right on the grip itself. Basically, the bottom of the grip flares slightly on the front and back, acting as a quick release plate. With a 38mm-wide dovetail, it is compatible with Arca-swiss style tripod heads/clamps or Arca-swiss compatible camera clips like the Spider Holster Spider Pro.
Click here to get the Fuji MHG-XE3 hand grip on Amazon.
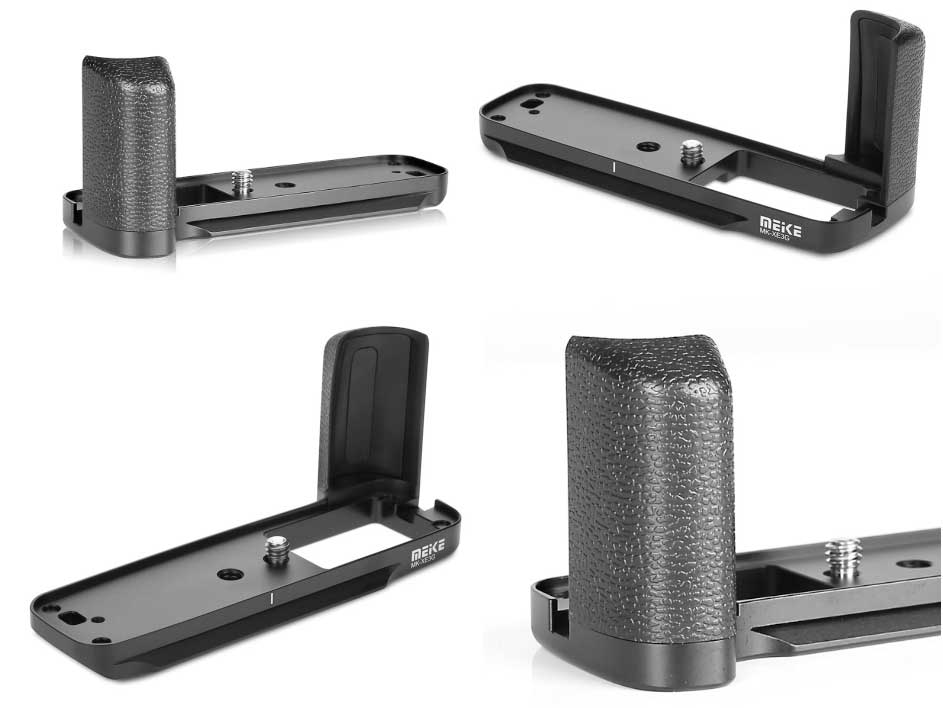
The steal: Mieke MK-XE3G grip
This grip is an almost exact copy of the official Fuji grip above. The biggest difference is the material on the grip itself. Its got a nicely textured grip, not quite as grippy as the rubber on the Fuji one, and it isn’t an exact match to the pleather covering of the X-E3. Aside from the Mieke branding on the back (LCD side of the camera), this grip is pretty much a copy of the Fuji grip.
It has the same cut-out for easy access to the battery and memory card slot, and it also has an Arca-swiss compatible quick release plate built in. The tripod mount is also centered with the lens axis. Basically, the only thing it doesn’t do is match the aesthetic of the X-E3 to the same level as the Fuji grip.
If you’re looking for a cheaper alternative to the official grip, and are not too concerned with exactly matching the look and materials to the camera, the Mieke MK-XE3G is a fantastic alternative that’s a 95% copy of the Fuji grip.
Click here to get the Mieke Fuji X-E3 hand grip on Amazon.
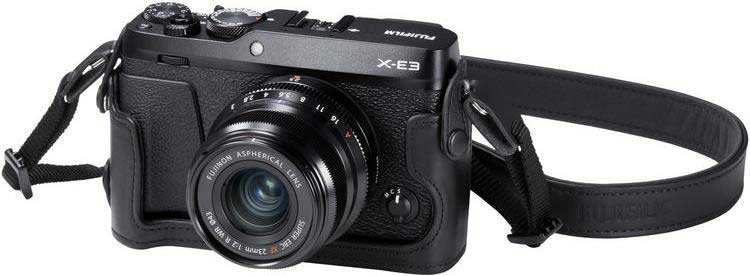
The alternative: Fuji BLC-XE3 leather half-case
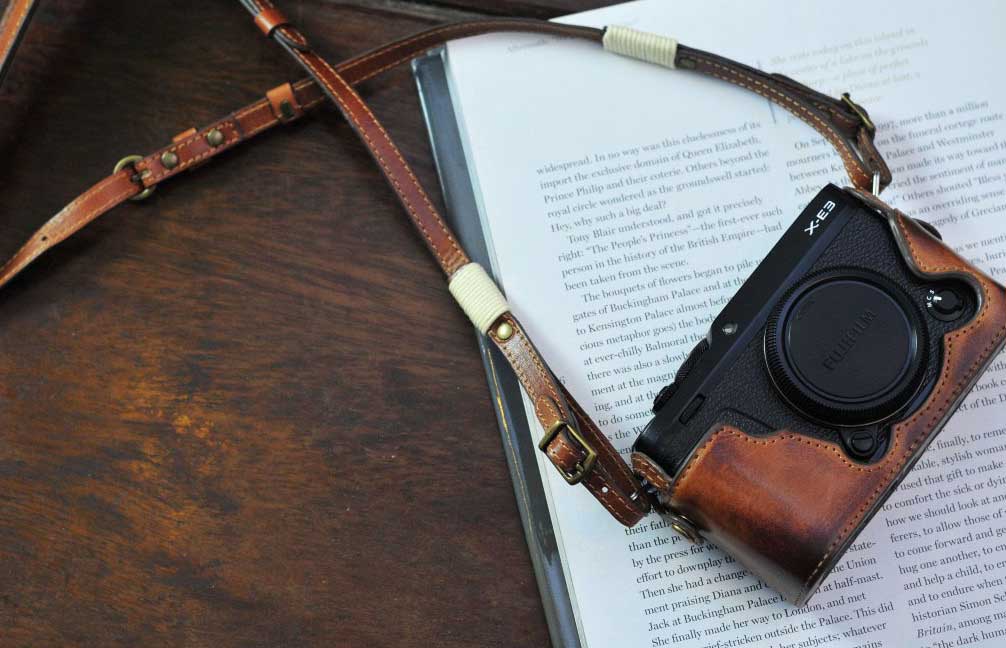
The official Fuji leather case for the X-E3 is a sexy half-case made of beautiful black leather. It comes with a matching leather strap, and a protective cloth.
Just like the metal grip above, it attaches via the tripod mount, but still provides easy access to the battery compartment.
Although the main purpose of a leather half-case is to protect your camera from bumps and scratches, the fact that this is made of real, thick leather also means that it improves your grip on the camera by quite a bit. It adds just the necessary amount of bulk to give your fingers something more to hold on to and the leather is naturally grippy. It works almost as well as the standard grip (above).
If you don’t need the built-in Arca Swiss style quick release clamp of the metal grips, and are not planning on using some large lenses, I would recommend this half-case instead of the MHG grip.
Click here to get the Fuji half-case for the X-E3 on Amazon.
Batteries and other must-haves
Extra battery
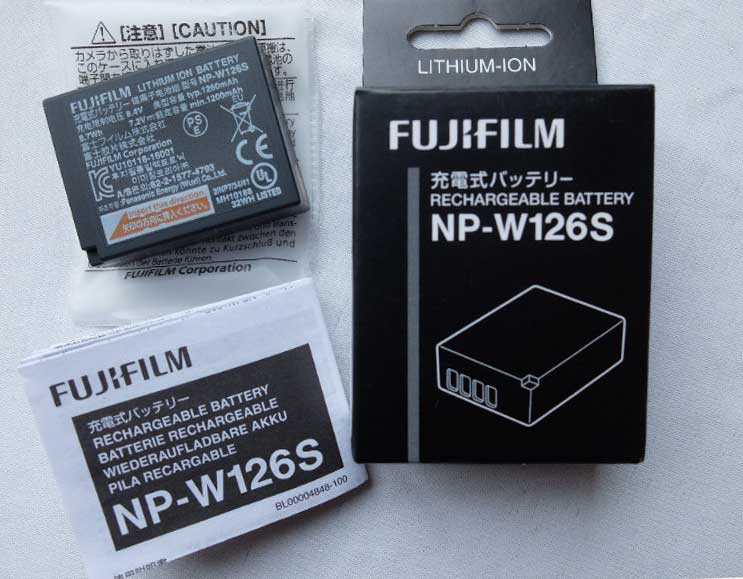
The X-E3 uses the latest Fuji NP-W126S battery, this is the updated version of the older NP-W126 battery (without the S) and can be used in almost every Fuji interchangeable lens camera (e.g. The Fuji X-T20, X-T2, X-Pro2, X-T100 and X-A5)
Basically, the ‘s’ version of the batter has better heat management, which allows better performance during 4K video recording, for example.
On the X-E3, this battery is rated for 350 shots per charge, based on the CIPA testing standard. That’s only a rating based on test usage, in real world shooting, that’s probably closer to 600+ shots, good enough for a full day of light stills shooting. Although once you start doing video (especially 4K) or if you take advantage of the always-on Bluetooth function (more on this below) then you will want at least one extra battery.
The X-E3 is the first Fujifilm camera to gain Bluetooth capabilities. It has an always-on Bluetooth feature which establishes a full time connection to your smartphone or device, allowing you to push images (JPEGs only) to your phone immediately after taking them; or in bulk once the camera is turned off (via in-camera WiFi) through the “Fujifilm camera remote” app.
If you prefer doing manual transfers of select images, the Bluetooth connection also serves as a way to easily reconnect to the camera’s WiFi (so you don’t have to keep manually reconnecting).
As you can imagine, this eats up quite a bit of battery life. But in my opinion, it is still far better to leave Bluetooth on, instead of going through the hassle of connecting to the camera’s WiFi every single time. Even if you don’t plan on immediately sharing all your images within moments of shooting them, it’s still nice to easily off-load one or two for quick sharing.
If you plan on using the X-E3 as a travel camera, I would recommend at least 1 extra battery, minimum.
Click here to shop the Fuji NP-W126s batteries on Amazon.
Screen protector
The Expert Shield Crystal Clear LCD protector is my choice for the X-E3. A good screen protector is easy to apply, guarantees your screen to be scratch free and doesn’t get in the way of the touch screen functions. Basically, you shouldn’t notice its there.
Expert Shield also make an anti-glare version of their screen protector for the X-E3, and I’ve read reports from some users that it slightly affects visibility in certain light. I can’t be sure of this, as I haven’t done a side-by-side comparison. I have used anti-glare screen protectors from Expert Shield for my other cameras, and haven’t really noticed any problems.
Wrist straps
Personally, I’m not a huge fan of wrist straps. I prefer using neck/shoulder straps, to always give me the option of keeping my hands free if needed.
But I know some people prefer using wrist straps especially for small and light cameras like the XE3. Wrist straps are less fiddly than shoulder straps, have less bulk, and just don’t get in the way as much, so I can definitely understand the appeal.
Peak Design Cuff
One of the best camera wrist straps right now is the updated Peak Design Cuff. If I were to use a wrist strap, this is the one I would get. It’s beautifully designed, it’s very low profile, and as is usual from Peak Design products, they’ve nailed all the tiny details.
The Cuff wrist strap is so unassuming, yet stylish and functional at the same time. You can even use it as a bracelet, ready to be connected to your camera at any time. The Cuff attaches to the camera via Peak Design’s new (and smaller) quick release anchor links (they’re the size of a penny) and also come with new aluminum hardware, that allows you to quickly cinch the strap tight around your wrist for maximum security.
The Peak Design Cuff is available in two really good looking colors: ash or black.
The Ona Kyoto
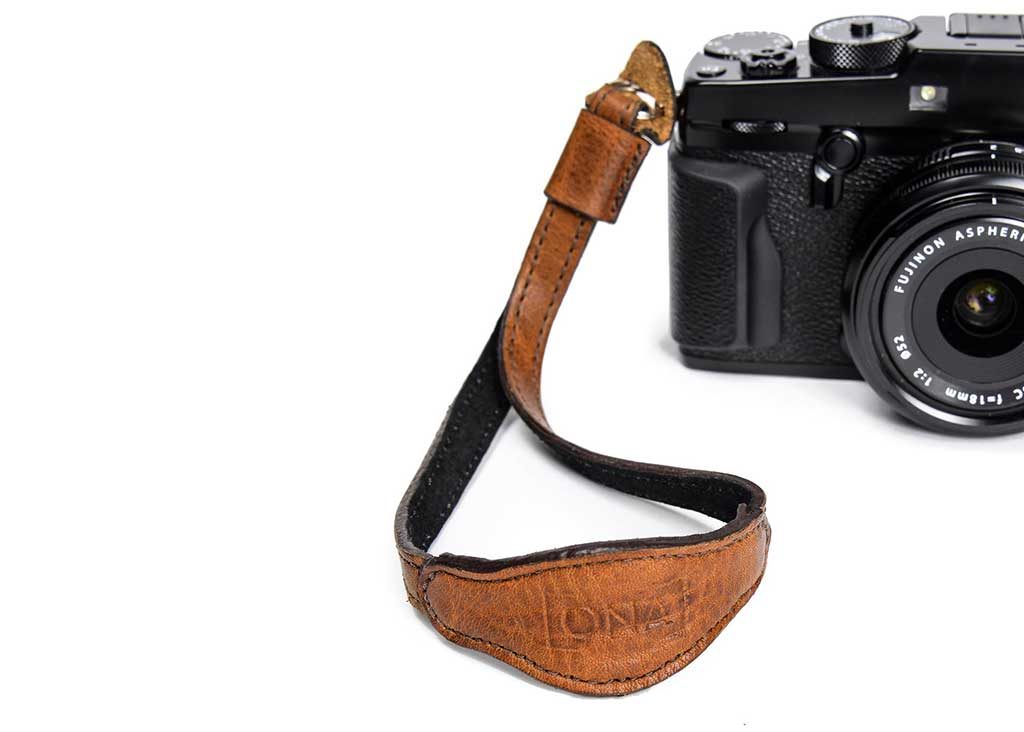
If you want a leather strap, the Ona Kyoto wrist strap is hard to beat. Handcrafted from the same leather used in Ona’s popular camera bags, the Ona Kyoto isn’t going to be as packable as the Peak Design Cuff, but you are getting premium full grain leather.
The inside of the strap is lined with suede, for better comfort against your skin. The great thing about leather is that it will show wear and patina over time, making each strap truly unique to its owner.
The Ona Kyoto is available in black leather and antique cognac leather.
Neck straps
My favorite – the Peak Design Leash
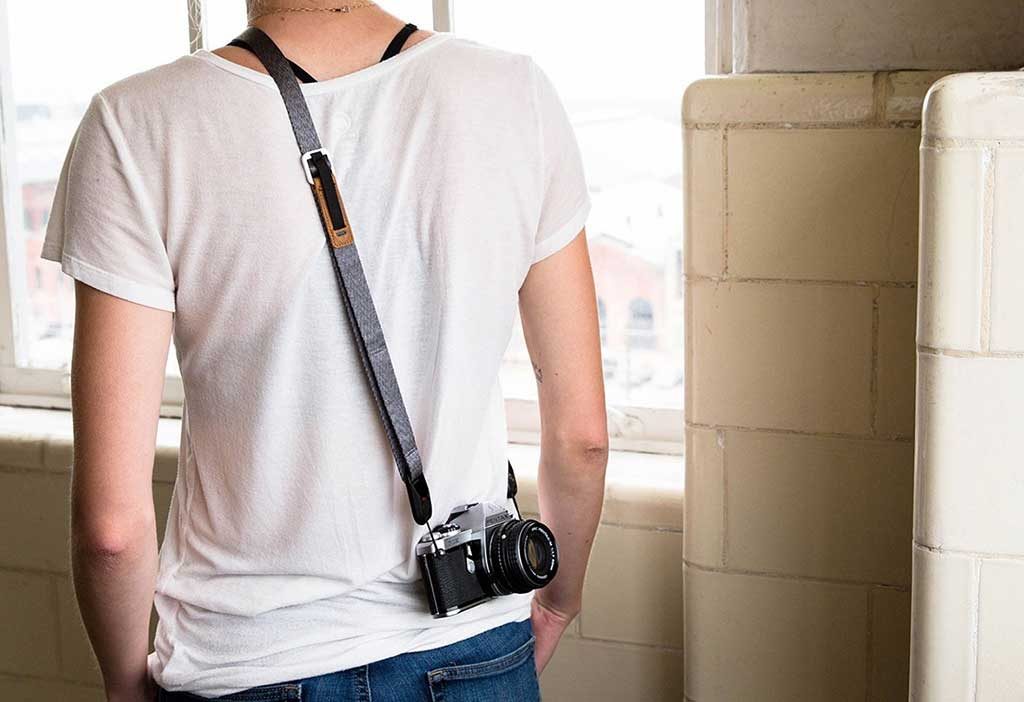
My favorite neck strap for smaller cameras is the Peak Design Leash. I reviewed it here and called it the best camera strap for small cameras. It’s still the strap I recommend the most, but there is actually a new updated version out right now, with a few nice upgrades.
Just like all Peak Design straps, the Leash connects via Peak Design’s anchor links, which are little quick release connectors that allow for quick and easy removal of the strap for those times when you want to tripod-mount your camera or anytime you don’t want a strap flapping around.
One reason I love Peak Design straps is their use of a seat-belt like webbing material for their straps. They glide effortlessly over clothing, which means that the strap works great as a shoulder and sling strap, instead of being limited to use as a neck strap.
New to the 2018 Leash strap is an aluminum adjuster that allows you to quickly shorten the strap when you want the camera tight to your body (so it isn’t bouncing around annoyingly when not shooting – this is great when riding a bike or when hiking), and to quickly loosen it so you can bring the camera up to your eye when you see the decisive moment 😉
And best of all, the Leash is such a minimalist strap that it hardly takes up any space in the bag. If you want, you can even store it in your pocket.
You can get the updated Peak Design Leash on Amazon where it is available in black and in ash.
The splurge: The Ona Presidio leather strap
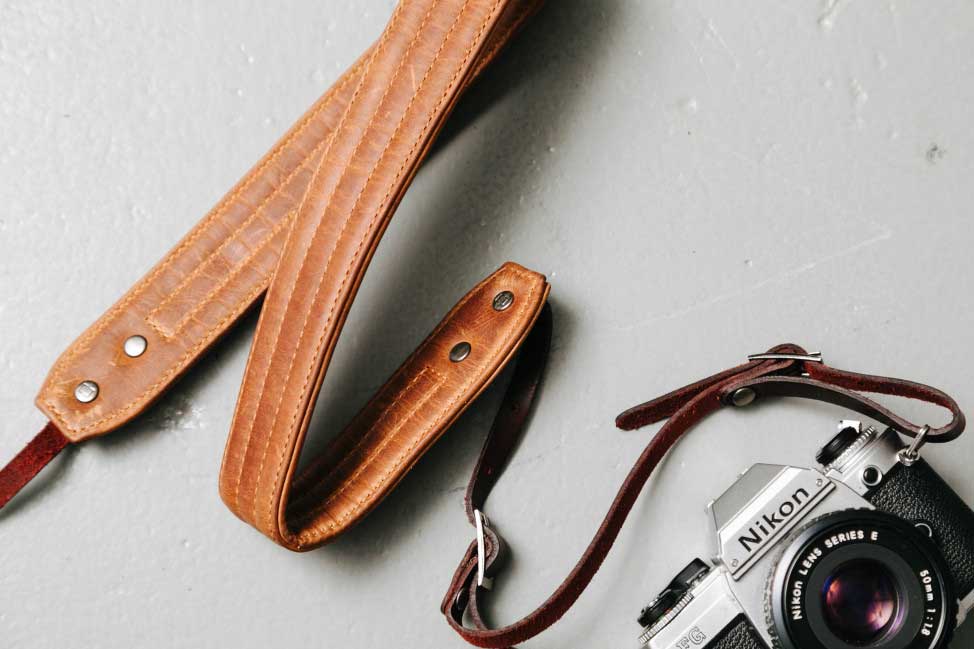
Well, if you don’t like the look of generic nylon straps and want a shoulder or neck strap that will really turn heads – look no further than the Presidio leather strap from Ona. I mean this has got to be one of the most stunning camera straps I’ve ever seen. It’s one of those things that look way better in real life than in pictures. Maybe you’ve owned some leather camera straps before, but I find it unlikely that you’ve used something of this quality. It is just stunning.
The Presidio is hand-crafted with amazingly soft Italian leather, but unlike your normal leather straps which are basically one piece of leather cut into a strap, the Presidio is actually padded with neoprene. Yep, a padded leather strap! I think this is the first camera leather strap I’ve ever come across that is made this way.
You get the stunning look and feel of leather that will age beautifully, yet you get the comfort of a padded neoprene strap. Although the Presidio is designed for larger cameras, it can pair well with the X-E3, simply because leather really does pair well with the Rangefinder-like aesthetic.
You can get the Ona Presidio in antique cognac leather or in black leather. The strap is also available in a variety of other colors, but take note that most of these are NOT leather – they are made of waxed canvas, with a similar neoprene lining. Not quite as nice, in my opinion. I’d rather get the leather ones.
Best memory cards
One of the biggest upgrades to the X-E3 is Fuji’s latest 24MP sensor, which is a nice bump from the older 16MP of the X-E2 and X-E2s. The downside of course is that this results in larger file sizes, especially if you shoot in Raw + JPEG.
Memory Cards for 4K video
Also new is the ability to shoot high quality 4K video – this not only requires a higher capacity card but it also requires a faster card, to be able to keep up with the massive amounts of data being written. Fujifilm states that the X-E3 requires a minimum UHS-I Class 3 card for 4K video.
Unfortunately, the X-E3 does not get UHS-II card slots like those found on higher models like the X-T2 and X-H1. So getting a UHS-II card won’t give you all the advantages of the UHS-II speeds, except if you have a UHS-II card-reader for transferring to your computer.
The best bang for the buck UHS-I cards right now are the SanDisk Extreme Pro 95 MB/s 64GB cards.
If you want a UHS-II card, for the faster transfer rate to your computer (needs a UHS-II card reader) or just to future-proof your cards for higher end cameras, two of the best value cards available now are the Lexar 2000X UHS-II 64GB (this comes with its own UHS-II USB card-reader) and the Sony G UHS-II 64GB cards.
Can I keep using older cards?
Yes, you can get by with using your older, slower cards on the X-E3 (except for 4K video), especially if you just shoot casually, JPEG only, and not a lot of burst shooting.
But depending on how old or slow your cards are, you may not be able to fully take advantage of the maximum burst rates of the camera, and the buffer will take longer to clear (i.e. when shooting multiple frames during fast action).
With faster cards, you will definitely notice a performance bump, even if it’s just the read/write speeds.
Other accessories to consider:
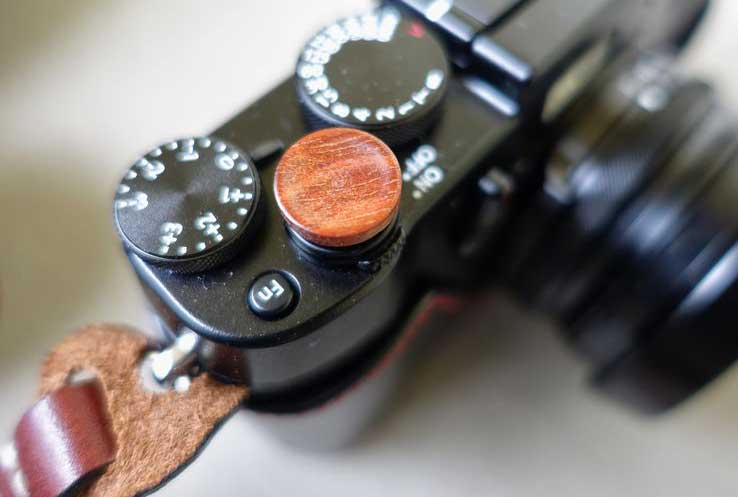
If you’ve seen other Fujifilm cameras, you’ve probably seen one of these. Tiny soft release buttons that go into the old-fashioned cable release threads found in almost every Fuji X-mount camera. Basically, these buttons are meant to heighten the release of the shutter, allowing you to gently squeeze the shutter, so you can minimize camera shake when shutting slower shutter speeds, or when shooting longer focal lengths.
These buttons are easy to find, you can grab cheap China-made ones on Amazon or eBay, they are available in every color imaginable, but if you want something with more personality, something that feels less generic, and something that will just look cool – then get one of the soft release buttons from Artisan Obscura.
These soft-release shutter buttons are made of wood, and have a really great hand feel. Artisan Obscura has a lot of great looking designs to choose from, and some of them are just beautiful.
Microphones
In the Fuji camera line-up, their rangefinder-like bodies are not really known for being video-centric, simply because the form factor doesn’t really lend itself to serious video use. But despite that, Fujifilm gave us lots of great video options on the X-E3, including 4K video up to 30p and 1080p Full HD up to 60fps. That’s more than good enough for the majority of us! If you’re a serious video shooter, you’d be looking at the Fujifilm X-H1 anyways.
Unfortunately, the X-E3 does not have a 3.5mm headphone jack, so you have to use the 2.5mm remote trigger socket to connect a microphone.
Rode Video Micro
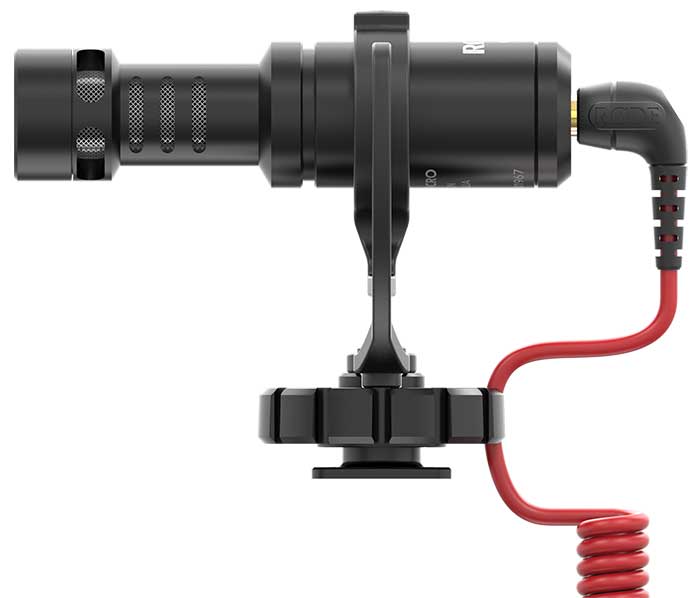
Since the X-E3 is such a lightweight and compact camera, you don’t want a large and heavy mic mounted on it. The Rode Video Micro is one of the most popular compact microphones available.
It weighs only 73 grams and is Rode’s lightest mic. It’s powered off the camera, so it won’t require batteries (that’s why it’s so small), it comes with a dead-cat (that furry cover for helping cut out wind noise) and a rycote shock mount is included (this helps minimize vibration noise).
The only downside is that it comes with the standard 3.5mm full-sized jack. To be able to use the Rode Video Micro on the X-E3, you need a 3.5mm to 2.5mm adapter, like this one.
The Rode mic is a directional microphone, meaning it’s going to try and reject ambient sound and try to record the sound in the direction it’s pointed at.
Fujifilm Mic-ST1 Stereo Microphone
Fuji’s official microphone is also relatively small, but unlike the Rode mic above, this Fuji mic is a unidirectional microphone. That means it’s got two proper stereo microphones that are arranged to record and deliver stereo sound – i.e. different audio in each track. By contrast, the directional Rode mic delivers the same audio in both tracks.
The Fuji mic is great if you want to record a lot of ambient sound for playback in a stereo speaker. But if you’re vlogging, you’re much better off with a directional mic like the Rode above.
The Fuji also has a full-sized 3.5mm jack, but they do include a 2.5mm converter in the box. Unfortunately, Fuji does not include a dead-cat or a shock mount in the box.
Gimbal Stabilizer
If you really want to take your videography to the next level, you might want to invest in a three-axis stabilizer to help you achieve buttery smooth video. While some Fujinon lenses, like the 18-55 XF kit lens has built-in image stabilization, they can’t match the smoothness that a proper gimbal can provide. More importantly, a lot of the smaller Fujinon primes, which are the best match for the X-E3, don’t have built-in image stabilization.
The X-E3 also lends itself well to gimbal use because it is extremely lightweight and because it has a touch-screen.
The Zhiyun Crane-M is the best gimbal for the Fuji X-E3 and other small and compact cameras. The Crane M is the smaller version of Zhiyun’s popular Crane series of gimbals, and is designed for payloads up to 650 grams or 1.5 lbs. An X-E3 with one of the Fujicron primes, like the Fujinon 23mm f/2 weighs just under 525 grams, so it is well within the limits. As long as your set-up isn’t too front heavy, you’re ok with going near or just over the payload limit.
The Crane-M is one of the more affordable gimbals out right now, it’s got extremely strong motors, excellent battery life (more than excellent, actually), has a tool-less adjustment system and is relatively easy to set-up and balance.
The biggest downside is that it will take up quite a bit of space in your bag. Although it’s designed for compact cameras like the X-E3 and the likes of the Canon M100, it’s still fairly close to the size of its bigger siblings, like the Crane 2. No one seems to have figured out how to make a relatively compact gimbal for smaller cameras so far. It’s either this, or you get the bigger gimbals like the Crane 2. There are smaller gimbals out there, but they are designed for action cameras like a GoPro, and even if you somehow figure out a way to jerry-rig these smaller gimbals to balance something like the X-E3, the motors are probably going to die pretty fast because they are not designed for heavier loads.
Best Lenses for the Fujifilm X-E3
Because of it’s diminutive size and ultralight weight, the XE3 is best paired with small prime lenses. Fortunately, Fujifilm has a great selection.
We’ve got a complete list of Fuji X-Mount primes here.
But, we always recommend starting with the original weather-resistant (WR) Fujicrons: The Fujifilm 23mm f/2, Fujifilm 35mm f/2 or the Fuji 50mm f/2.


I’d love an educated opinion in the wisdon of using stepup rings so that each of my fujifilm kens (23, 27, 18) can use the sale size scre in filter (nd). Since they are 39, 43, 52mm) i am thinkjng that steppingnthe smaller lens to the 52 will allow me common usage? Is thatmwise or better to have a separate filter for each?
Same on a lens hood, would there be a savings or just more coomplexity and hassle?
Thanks
I’d just buy a filter for each, just much less hassle, and will also minimize the risk of vignetting.
But if it’s only for occasional use, and doesn’t result in objectionable vignetting, see if it’s worth it for you to deal with the hassle of stepping rings.
Although if you plan on using ND’s a lot (e.g. doing video and trying to stick to the 180 degree shutter rule), it can be a pain to keep screwing the stepping rings on and off.
One thing you could do would be to leave the step-up rings on the lenses, so all you need to do is move the filter between lenses, but then you’d also need to buy new lens caps.