The tiny, little Canon M50 has really won me over. And to help fellow M50 enthusiasts, I’ve rounded up some of the best Canon M50 accessories to help you get the most out of this under rated gem.
The Canon M50 (and the new M50 Mark II) is one of Canon’s sleeper hits – it’s one of the best all-around cameras and has charmed enthusiasts, YouTubers, content creators, moms and dads – and is also a great option for beginners looking for a lightweight camera with a system that they can really grow into.
Compared to your typical DSLR, the M50 and M50 II are small, light and convenient. They’re very unassuming little cameras that pack a real punch especially with just a few accessory upgrades.
They’re often overlooked in favor of full frame mirrorless systems, but with the right kit, these little wonders can transform into a serious content creation machine that can do everything you need it to do.
In many ways, the M50 line is the most important camera in Canon’s EOS M system, so far.
Some of the earlier M cameras were largely ignored by ‘experts’ but with the sheer amount of features that Canon has packed into the M50 – such as the amazing Canon dual pixel CMOS autofocus system, 4K video, a best-in-class touch screen interface PLUS what is now (in 2021) a very well rounded out lens ecosystem – this shows that Canon is dead serious in making its EOS M system a real player in the market.
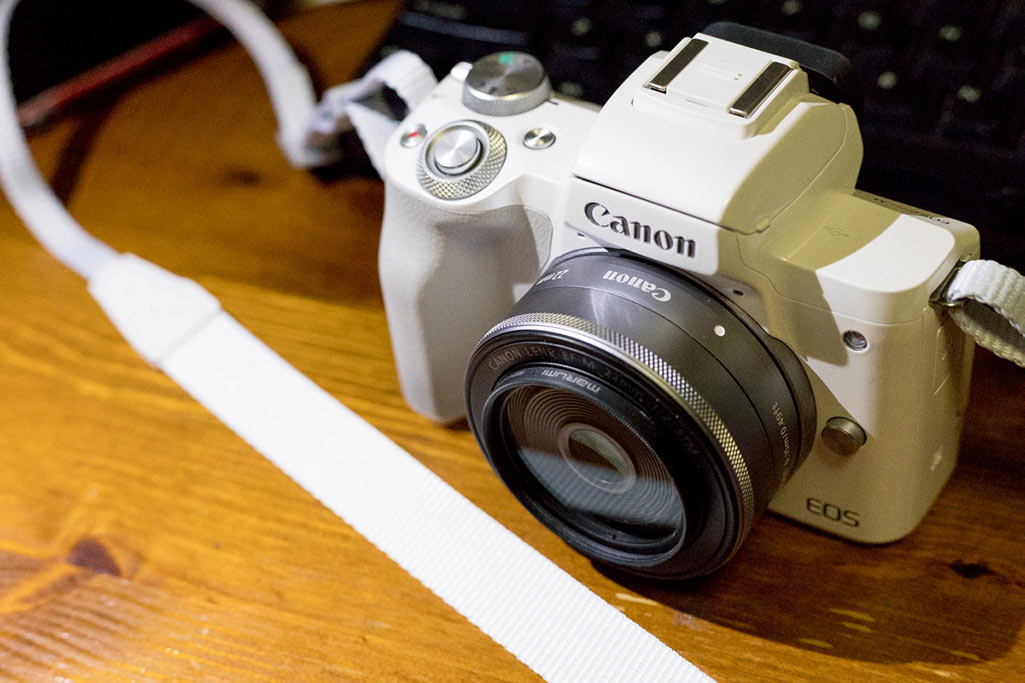
Best Lenses for the Canon M50
If you’re looking for the best lenses to complete your line-up – I’ve got a whole separate article for that – you can check the best lenses for the Canon M50 and M50 Mark II here.
Canon M50 PDF Manual
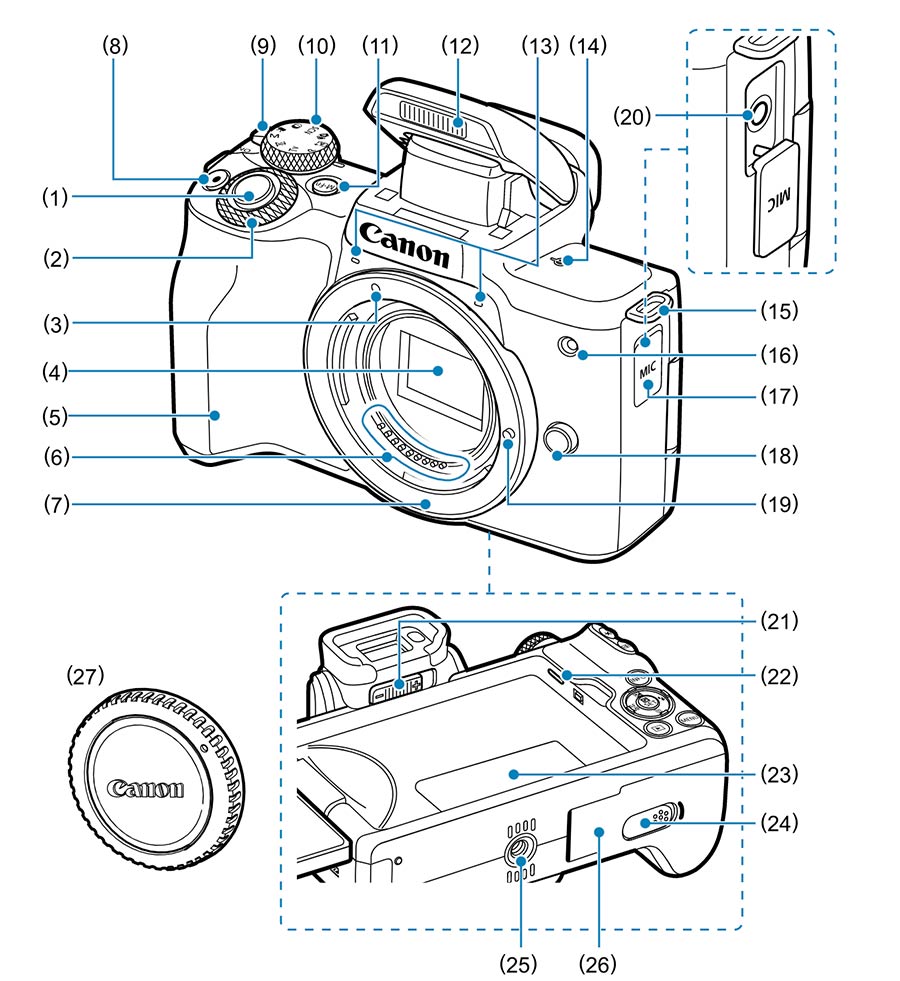
First things first – if you haven’t yet, I recommend you download PDF versions of the Canon M50 manual to your phone, as a quick reference. It might just come in useful when you’re out in the field.
Download a PDF copy of the full Canon M50 manual here.
And you can grab a PDF copy of the complete Canon M50 Help Guide here.
Extra battery
The Canon M50 uses the Canon LP-E12 lithium-ion battery pack.
This is also the same battery used by the Canon M100, M200, EOS Rebel SL1 and the Canon SX70 HS.
It’s a small battery, with a paltry capacity of 875 mAh. In short, if you’re the type who takes a lot of photos in one photo session or in one day, you will need at least one extra battery.
How long will the battery last?
On the M50, the LP-E12 is rated at a measly 235 shots (CIPA rating) whether using the EVF or LCD. You can expect to shoot about 1.5 hours of continuous video with a single charge.
In real world conditions, you’re going to get a bit more than that with normal everyday shooting. But your battery will deplete faster under certain conditions, such as when doing lots of video, when reviewing images or changing menu settings more than the usual or when shooting in cold weather, for example.
I always recommend extra batteries for most any camera. No point in having a great camera with you if you run out of juice.
Third party batteries with dual charger
There are several third-party batteries, that work very well. But in my experience, most third-party batteries just don’t have the same lifetime as OEM batteries.
If you film a lot, my recommendation is to pick up one original Canon LP-E12 battery, and a pack of BM Premium LP-E12 batteries (which includes 2 batteries and a dual charger).
You can use the extra original battery as your second battery for most day to day shooting, and the two extra third party batteries as your emergency batteries for vacation, or for those days in the park with the kids.
The extra charger will come in handy too, for charging two batteries at the same time. This is great when traveling, for example.
Canon LP-E12 batteries are charged with the Canon LC-E12 charger. Fortunately, the Canon M50 comes with a charger in the box. Most cameras nowadays don’t have dedicated chargers, for some reason. The trend is towards in-camera charging, like a cellphone.
Best Memory card for the Canon M50
The Canon M50 has one memory card slot, which supports SDHC and SDXC memory cards. The M50 supports UHS-I speeds but UHS-II speeds are not supported.

Here are a few recommended SD cards for the Canon M50:
Sandisk 64GB Extreme PRO SDXC UHS-1 U3 Card (or get the 64GB + 128GB bundle)
Sandisk 64GB Extreme SDXC UHS-1 U3 Card
Lexar Professional 64GB 633x SDXC UHS-1 U3 Card
You can still get UHS-II cards, the M50 and the M50 mark II just can’t write at the faster UHS-II speeds, BUT SD cards labeled as UHS-II will still work.
They will be a waste of money though, since UHS-II cards won’t give you any added benefit over cheaper UHS-I cards.
But, even with UHS-I cards, you will see some differences in write times, so you don’t want to get just any card.
What SD cards for video?
UHS I cards that are labeled U3 are recommended for doing video on the M50. If you plan on purely doing stills photography, U1 cards are fine.
All cards recommended above are U3 cards.
UHS-I cards are available in two speeds:
U1: 10Mbps write speeds
U3: 30Mbps write speeds
NOTE: The speeds written on the cards themselves or the retail packaging are the READ speeds, which are always significantly faster than the WRITE speeds.
Read speeds matter when you transfer your images and videos to your computer, but are not indicative of how the card will perform while in the camera.
If you plan to do a fair bit of video, try to get a 64GB card, at minimum. The M50 records at a maximum bit rate of 150Mbps, which doesn’t require the fastest cards, but it can still fill up small cards pretty fast.
Lens Filters for the Canon M50
The most common types of filters are UV filters, ND filters and polarizing filters (CPL filters).
For most people, I don’t really recommend getting anything other than these three.
Good quality filters can last a lifetime, and can be used on other lenses and different camera systems, so long as the lenses take the same filter size.
What size filter do you need?
The size of the filter you need is dependent on the lens you want to use it on. You need to find out what filter size your lens takes.
Please note that the focal length of your lens is NOT your filter size.
You can usually find this written on the front threads of your lens, or on the back of your lens cap. The filter size is denoted by a Ø symbol.
e.g. It’s either going to say something like 49mm or Ø49 – which means that your lens takes 49mm filters.
Popular EOS-M lenses and their filter size
If you purchased your M50 with the Canon 15-45mm kit lens, this lens has a 49mm filter thread, so you will want to get 49mm filters.
The Canon EF-M 11-22mm ultra wide angle lens has a 55mm filter thread. The Canon EF-M 22mm f/2 pancake lens has a 43mm filter thread, same as the Canon EF-M 32mm f/1.4 STM lens. Make sure you check your lens to determine the correct size filter you need.
By the way, if you haven’t yet, you can check out my recommended lenses for the Canon M50 and M50 Mark II here.
UV filters for the Canon M50
Unlike film cameras, modern digital cameras now have in-built filters that keep UV light at bay.
But that doesn’t mean UV filters are now useless. At a bare minimum, a UV lens will do wonders in protecting the front element of your lens. Its main purpose is to protect your lens from dust and dirt, scratches and finger print smudges.
Best UV Filters for the Canon M50 with the 15-45mm kit lens (49mm filter thread size):
Breakthrough Photography 49mm X2 UV Filter, Ultra Slim
B+W 49mm XS-PRO UV protection filter, Extra Slim Mount
UV filters are particularly indispensable when shooting at the beach, for example. It helps protect your lens from sand and sea spray. And the glass filter is easier to wipe down and clean vs a bare lens.
Bad quality UV filters can negatively impact your images, by introducing ghosting and flare in your images, this is why it’s important to get good quality ones.
Polarizer or CPL Filters for the Canon M50
Like the name suggests, these filters polarize the light coming into the camera, which helps in reducing reflected light.
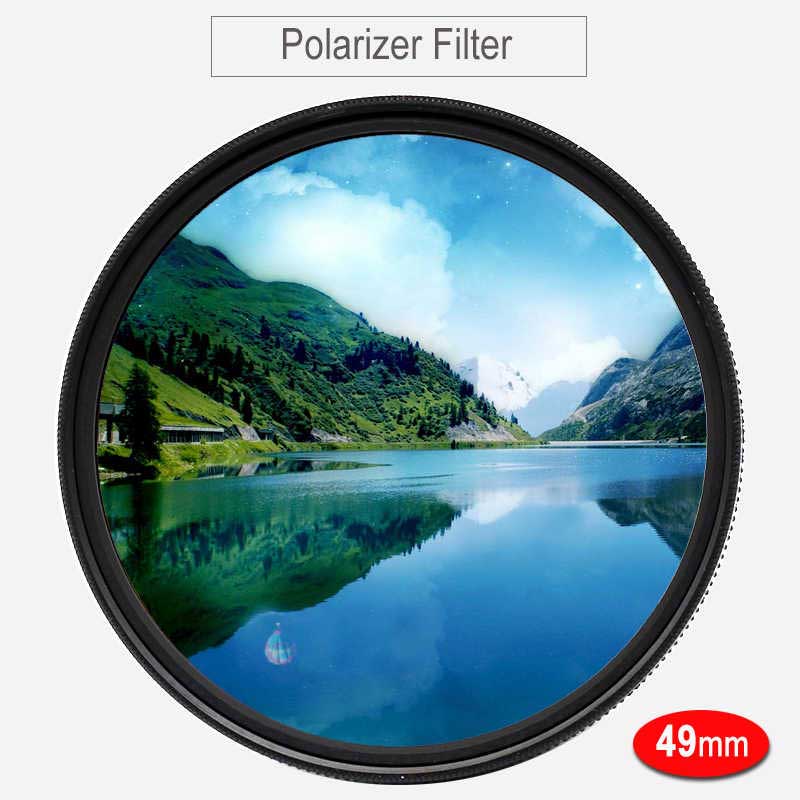
This is great for reducing glare from shiny, non-metallic surfaces such as the ocean, lakes, etc.. and glass from windows and buildings. Not only does this improve the contrast in your images, but it can capture detail that you wouldn’t normally be able to because of glare.
Aside from darkening skies to add a bit more pop to your images, CPL filters are also great for removing glare when shooting through windows.
Recommended CPL filters for the Canon M50 with the 15-45mm kit lens (49mm filter thread size):
Breakthrough Photography 49mm X2 Circular Polarizer
B+W Kaesemann 49mm Circular Polarizer
Recommended CPL Filters for the Canon 22mm f/2 (43mm filter thread size):
Breakthrough Photography 43mm X2 Circular Polarizer
B+W Kaesemann XS-PRO 43mm Circular Polarizer, extra slim
Because you can’t duplicate most of the effects of a polarizer in post-processing software, polarizers are considered essential by most photographers. They don’t take a lot of space in the bag, and are very useful in a wide variety of situations, indoor and outdoor.
ND Filter or Variable ND Filters for the Canon M50
Neutral Density filters decrease the amount of light entering your camera. Photography is all about getting as much light as possible right? So, why would you want that?
There are times where you want to use a longer shutter speed without stopping your lens down too much – i.e. when you want to blur waterfalls and ocean waves or; when you want to shoot wide-open with a fast aperture (e.g. f/1.8 or f/1.4) on a bright day, but your camera only goes up to a certain shutter speed.
Recommended Fixed ND Filters for the Canon M50 with the 15-45mm Kit Lens (49mm filter thread size):
Breakthrough Photography 49mm 6-Stop ND Filter, Ultra Slim
Recommended Fixed ND Filters for the Canon EF-M 11-22mm STM Lens (55mm filter thread size)
Breakthrough Photography 55mm 6-stop ND Filter, Ultra Slim
Fixed ND filters are great if you only need one occasionally for stills photography. But, if you do a lot of landscape photography and see yourself swapping out different ND filters, it might be better to get a variable ND filter instead.
Variable ND filters (below) on the other had allow for more fine-grained control. Like the name suggest, vari-ND filters allow you to adjust the light hitting the lens from 1 stop to 8 stops.
This is great if you don’t want to keep switching between individual fixed ND filters just to get your desired effect. It is also very useful for shooting video, when you want to maintain the 180-degree shutter rule for more natural looking video.
Variable ND filters work by having a rotatable ring on the outer side of the lens, which lets you increase or decrease the amount of light entering the camera simply by rotating the lens.
Recommended Variable ND Filters for the Canon M50 with the 15-45mm kit lens (49mm filter threads):
GOBE 49mm Variable ND Filter (ND2-400)
K&F Concept 49mm Variable ND Filter (ND2-400)
Recommended Variable ND Filters for the Canon EF-M 22mm f/2 lens (43m filter threads)
GOBE 43mm Variable ND Filter (ND2-400)
K&F Concept 43mm Variable ND Filter (ND2-400)
Recommended Variable ND Filters for the Canon EF-M 11-22mm STM lens (55mm filter threads)
GOBE 55mm Variable ND Filter (ND2-400)
K&F Concept 55mm Variable ND Filter (ND2-32)
Camera Strap
I never use the stock strap that comes with any of my cameras. No matter how nice they are. I just dislike having a large logo hanging around my neck or shoulder.
Plus, for some reason, most stock camera straps are often unnecessarily bulky and not easy to take on and off. I don’t always want a strap on my camera, so being able to easily take one off is a big plus.
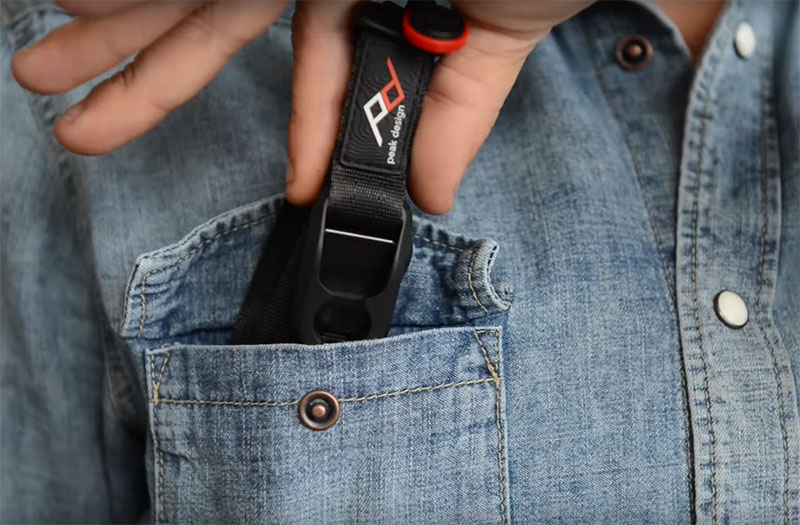
I recommend the Peak Design Leash strap for small mirrorless cameras like the Canon M50. It’s well designed, extremely easy to adjust (easy to let out for easier access and to shorten to keep the camera close to your body).
It also comes with nice connectors that are easy to pop on and off, while still making sure your camera is secure when needed.
One great thing about the Peak Design Leash (and all Peak Design straps) is that they use a seatbelt like material which easily glides around clothes.
This is my preferred strap material, since I typically hang a camera cross body. i.e. it’s slung on my side, near my hip, under my elbow/armpit area, when not in use, and I can easily swing it up to shoot.
If you want something wider, because you plan on using heavier lenses with the EF/EF-S to EF-M adapter, you can get the Peak Design Slide Lite. This is a much wider strap, designed for heavier set-ups.
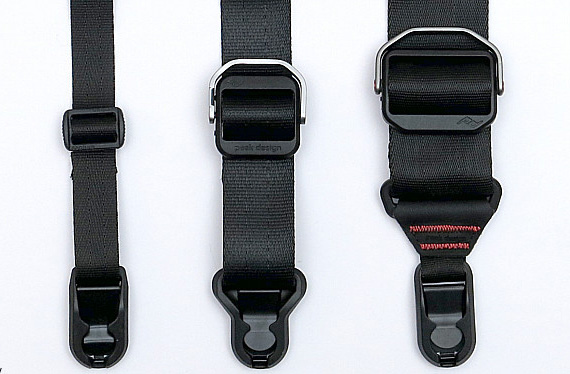
Aside from the width difference vs the Leash, the Slide Lite also has a grippy material on one side, for when you want to carry your camera on one shoulder (not crossbody) and you don’t want it slipping off your shoulder.
But you still get the regular non-grippy material if you flip the strap over.
If you dislike straps that are like seatbelts, and prefer a grippy and thick strap, you can checkout the OP/TECH USA EZ Comfort strap. Made of neoprene, this will be sure to stick to your shoulder. The downside is that it is a bit bulky.
The big downside is that it has no quick-disconnect mechanism of any kind. For me personally, that means it’s a no-go, since I like to be able to quickly disconnect straps. But if you want the extra peace of mind and don’t want risking accidentally dropping your camera because of a quick release strap, this is the one to get.
Camera Bags for the Canon M50
The best bag for the Canon M50 is going to depend on how many lenses you want to carry, including other non-camera gear you may want to haul around.
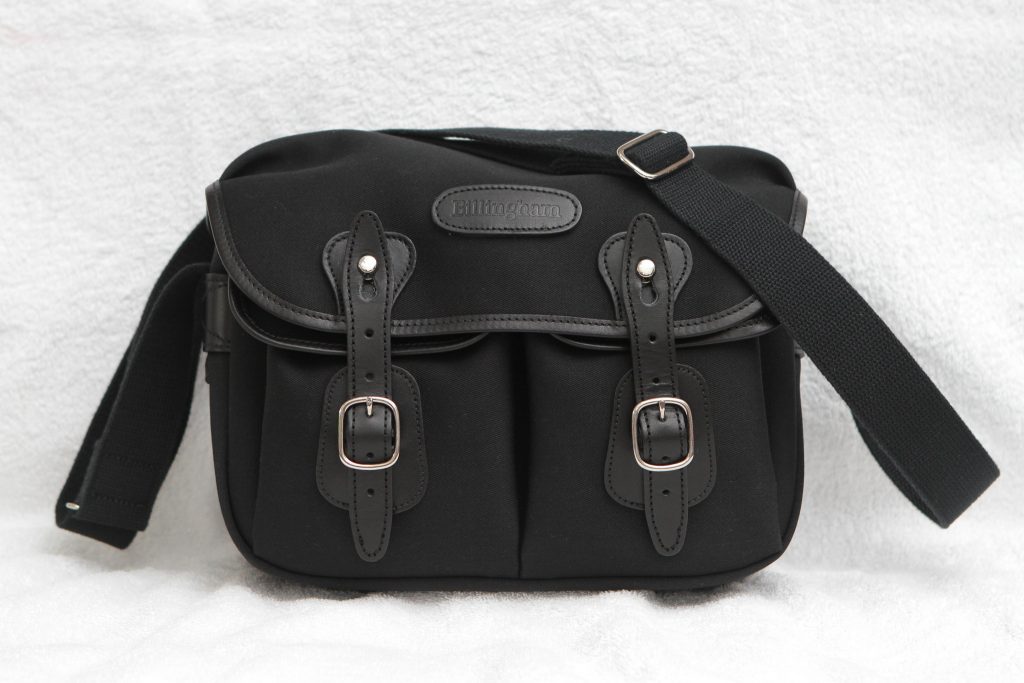
If you want something nice that will last a really, long time, I’m a huge fan of the Billingham Hadley Small Pro (my review of the older version is here). It’s very functional, no zippers to scratch your gear, its got two large dump pockets, and is highly water resistant. It’s also expensive.
Another popular option are the Peak Design Sling bags, which have now been updated to version 2 models. If you only plan on carrying the camera and only one lens, the Peak Design 3L sling is a great, low profile option.
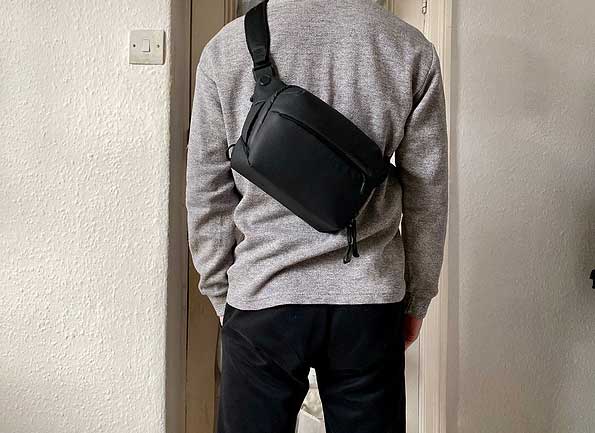
If you want more space, the newly redesigned Peak Design 6L sling will offer more space, including a sleeve for an 11” tablet.
One great feature of Peak Design sling bags is they have included a mounting point for the Peak Design Capture Clip v3, allowing you to quickly attach/detach your camera to the outside of the bag. This clip is a great alternative to using a camera strap to keep your hands free.
Another fantastic bag to consider is the Think Tank Retrospective 5 shoulder bag. It’s more affordable than the Billingham Hadley Small. It’s good looking, in a very understated and rugged sort of way, so it doesn’t draw a lot of attention to itself. Like most Think Tank bags, it is extremely functional, with very well thought out features, such as a silent closure system.
Camera Case for the Canon M50
Canon PSC-4200 Deluxe Soft Case – this is a great, compact case. This holster/case was actually designed for the Canon SX series of bridge cameras, which are about the same size as the Canon M50 with e.g. the EF-M 11-22mm lens.
Internal measurements are about 6.75 inches tall, 6 inches wide and 3.75 inches deep. So, the Canon M50 with the EF-M 15-45mm kit lens will fit just fine, but the M50 with the EF-M 18-150mm will NOT fit, because the lens is too long.
This is a great option if you want something extremely compact, and only want to carry an extra battery and nothing else. Don’t let the pictures mislead you into thinking this is a small shoulder bag, it’s really more like a holster. Camera with small lens + battery, that’s about it. Even a not-so-bulky wallet won’t fit in here.
MegaGear Ultralight Neoprene Camera Case – available in a variety of colors, this neoprene pouch is designed for the M50 with the EF-M 15-45mm kit lens.
If you want something inexpensive and functional, this is the one to get. The nicely padded neoprene is water resistant, and is great for protecting your camera and lens from bumps and dirt.
The inside is lined with soft foam, to prevent scratches to your camera.
It’s a good fit, not too tight, but tight enough so there isn’t a lot of unnecessary bulk. This is great because that means you can squeeze this inside non-camera bags. The stretchy neoprene also means it isn’t that hard to take your camera off the case.
Bluetooth Wireless Remote
Because the Canon M50 does not have an infrared sensor, the only way to get the shutter to fire wirelessly is with a bluetooth remote or via the Canon Camera Connect App.
NOTE: The Canon RC-6 remote does NOT work with the Canon M50.
In fact, the M50 doesn’t even accept a wired remote, so these are great options for triggering the shutter without introducing shake to the camera (e.g. when doing long exposures on a tripod).
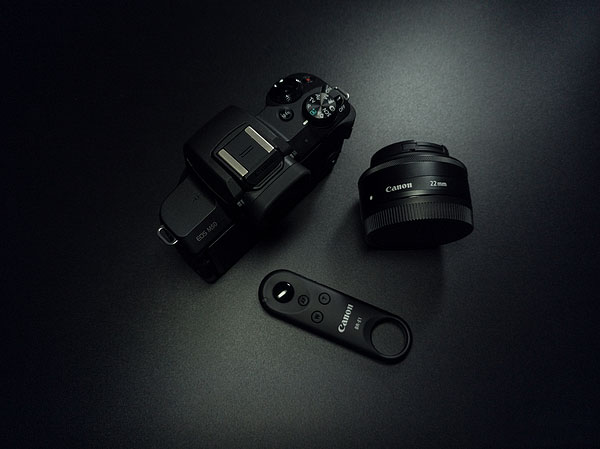
Canon BR-E1 Bluetooth Remote (2140C001)
With an operating range of 16 feet, and requiring no line of sight to the camera, this is the best bluetooth remote for the Canon M50.
It’s tiny, it’s built extremely well and it works perfectly – so long as you set it up correctly.
Aodelan BR-E1A Bluetooth Remote
This is a knock off of the Canon BR-E1 remote above. I haven’t personally tried this, but it seems to work just as well as the Canon one.
One advantage this may have, just based on reading the specs, is that the Aodelan has double the range of the Canon. This one can work up to 32 feet.
Again, haven’t used this personally because I already have the Canon one, but it’s got great reviews.
Except for the logo, it looks almost exactly like the Canon remote, too.
Recommended Lenses
I have a complete list of the best lenses for the Canon M50 here, including the best telephoto lens, best ultra-wide lens and best all-around lens.
Lens adapter for Canon EF and EF-S Lenses
You can use Canon’s EOS M mount adapter for your EF and EF-S DSLR lenses.
The Canon M50 uses Canon’s EF-M mount for mirrorless. They already have a great selection of light and compact EF-M lenses, perfect for small cameras like the M50, M50 Mark II and the Canon M6 Mark II and the other EF-M cameras.
But, if you currently own Canon EF-S and EF lenses for Canon DSLR’s, you can still use your lenses on the M50 and other M cameras with this adapter.
The best part is, you can get a near native experience with the official Canon adapter. It is compatible with all lens functions, including image stabilization and auto focus.
EF-S and EF lenses are also compatible with all camera features, such as dual pixel autofocus and touch AF.
NOTE: Canon RF lenses – for the new Canon full frame mirrorless RF mount such as the Canon R5, R6, Rp – will NOT work on these adapters. To date, there are no adapters for RF lenses to mount on EF-M cameras.
The only downside is that most EF-S and EF lenses are significantly larger and heavier than EF-M lenses. Throw in the extra length of the adapter, and it’ll throw off the balance a bit.
Now, that might be a small price to pay, considering that you can use all your existing lenses and won’t need to pony up extra dollars for a full set of EF-M lenses.
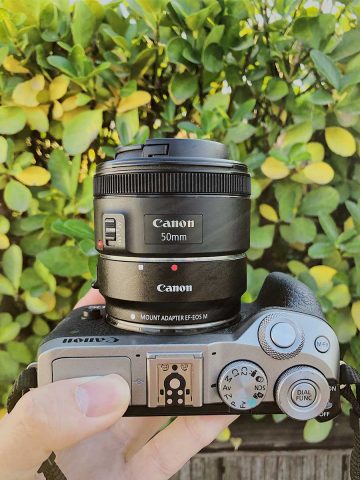
Or, maybe you just want something inexpensive that will give fantastic results, such as the nifty fifty Canon EF 50mm f/1.8 STM lens, (see pic above) which will become a nice, short telephoto portrait lens on an M50 or Canon M6 Mark II.
NOTE: The Canon EF 50mm f/1.8 on an adapter is a great option IF you are on a strict budget and need something cheap yet capable of great results or;
if you plan to also use the lens on a Canon DSLR, or;
if you plan to use the adapter with other EF/EF-S lenses.
But, if not, I’d save a bit more to get the Sigma 56mm f/1.4 for Canon M mount instead. I do think it’s worth the extra over the Canon 50mm.
Speed Booster
Speed boosters allow you to use full frame Canon EF lenses on your M series camera, while providing a 1-stop brighter aperture.
Unlike traditional adapters (like above), these speed boosters also only have a 0.71x crop factor, instead of the usual 1.6x crop factor if you use full frame EF glass.
NOTE: Speed boosters only work for full frame EF lenses. They will not work for EF-S lenses.
Viltrox EF-EOS M2 0.71x Lens Mount Adapter for Canon EF Mount Lens to Canon EF-M Mount Camera
This speedbooster allows for the use of full frame Canon EF lenses on Canon EF-M cameras, like the M50, M6 Mark II, Canon M5 etc.. while allowing you to reclaim 0.71x angle of view over the 1.6x crop of the APS-C sensor.
So, for example, if you were to use the Canon EF 50mm f/1.8 on this adapter, it would have an equivalent field of view of roughly 57mm. I.e. 50mm x 1.6x crop factor = 80mm. You then multiply this by the speedbooster’s 0.71x crop factor: 80mm x 0.71x = 56.8mm or roughly 57mm. This way, you get very close to the intended angle of view of the Canon EF 50mm f/1.8 lens on a full frame camera.
Another benefit is that your Canon EF lens will now be a stop faster. Basically, the formula is (lens aperture x 0.71) x 1.6 crop factor. So, again using the EF 50mm f/1.8 lens as an example, the lens will be like mounting a regular 50mm f/1.2 lens on an EF-M camera. With the 1.6x APS-C crop factor, the 50mm f/1.8 EF lens will render roughly similar to a 57mm f/2 lens.
For a full list of compatible lenses for the Viltrox, click here.
Best Vlogging and Video Accessories for the Canon M50:
Best Handheld 3-axis Gimbal
Zhiyun Weebill S
Maximum Payload: 6.61 lbs or 2.9 kg
The Weebill S is a fantastic gimbal. An absolute bargain for what you get, it is easy to balance, and best of all, it’s small and light and packs down to a compact size for easy transport.
This is professional level equipment, without the professional level price.
This will fly a Canon M50 with pretty much anything you want it to. If you want to use EF and EF-S glass on an adapter, no problem (unless you use really big and heavy lenses).
You want to keep your cage on the camera? No problem. Want to mount a microphone? No problem too.
This gimbal can fly much bigger and heavier set-ups, including full frame mirrorless and DSLRs.
For anyone serious about content creation and video production, you simply can’t go wrong with this one.
But, if all you want is to do simple follow shots, maybe for your vacation videos or a day in the park with your kids, this will likely be overkill. You can check out the Feiyutech G6 Max below, which is cheaper.
Check price and availability of the Zhiyun Weebill S on Amazon.
Feiyutech G6 Max
Maximum Payload: 2.65 lbs or 1.2 kg
The G6 Max is one of the smallest gimbals capable of flying a Canon M50 with most EF-M lenses.
It weighs about 665 grams, with powerful brushless motors capable of carrying up to 1.2 kg as long as your set-up isn’t too front heavy and you’re not looking to do fancy movements.
Battery life is officially rated around 9 hours of use with a 600 gram setup. With an M50 and the EF-M 11-22mm (607 grams), battery life is just over 5 hours for me. But, a lot of it will depend on how well you balance your kit, and the kind of camera movements you’re looking to do.
If you’re looking to use native Canon EF-M lenses, this is a better value option than the Weebil S.
If you want to use longer lenses, or adapted EF and EF-S lenses you are best served by a larger gimbal like the Zhiyun Weebil S (above). Ditto if you plan on doing a lot of fancy gimbal movements. But for normal vlogging, or chasing your pets or kids around, this is a great, easy to carry option.
Check the price and availability of the Feiyutech G6 Max on Amazon.
Camera cage
SmallRig Cage for Canon M50 and M5
A cage isn’t always necessary, depending on the set-up you use. If you’re just sitting in your living room or home office and doing talking head videos, it’s largely unnecessary.
But if you do a lot of run and gun shooting, with lots of accessories, this thing will transform your M50 into a content creation monster.
This SmallRig cage adds a more substantial grip to the camera, amd especially useful once you start mounting a microphone and lights.
That’s what camera cages are mainly for – mics and lights!
It also adds some protection around the camera body, while still retaining the small and light feeling of the M50.
There are various mounting points, including a cold shoe up top. You can mount a video light on the camera, and you can mount a microphone on the cage. Perfect!
It also keeps everything accessible. The LCD screen will still open like normal, you can still pop your strap on and off easily, the battery door is still fully accessible.
Because it has an ARCA compatible rail on the bottom, you won’t need to screw a quick release plate on and off just to access your battery compartment!
Some people are hesitant to get a rig for small cameras like the M50, but if you find yourself needing to mount more than a shotgun mic, this thing will really transform your camera.
Check current price and availability of the SmallRig Cage for the Canon M50 and M5 on Amazon.
NOTE: The basic cage package does NOT come with the top handle. But you can get the cage bundled with the SmallRig 1638B top handle.
Or, you can get the cage and one of the other compatible SmallRig top handles, depending on your needs:
SmallRig 1446 – top handle with rubber grip
SmallRig 1984 – adjustable handle, with two cold shoe mounts and built in spanner
SmallRig 1955 – sliding handle, with two cold shoe mounts and built in spanner, with NATO clamp for easier removal
https://www.youtube.com/watch?v=KESjvc4z4nA – side handles
External microphone
Whenever possible, I try to avoid using the in-camera microphone. If you’ve ever done any kind of video, you probably quickly realized that in-camera microphones just don’t provide quality audio. If you want any kind of control over what audio you can record, you will need an external microphone.
Not only does the internal microphone not sound very good, because it is literally inside the camera body, it also has a tendency to pick up every little noise. From the autofocus motors in the lens, to the mechanical noise and other structural noise (e.g. anytime you move your camera).
External microphones easily overcome these problems because they’re mounted away from the camera body on a shock mount. They also give you more control over what audio you record because they are designed to reject background noise and to minimize wind noise.
If you’re looking for the one accessory that can take your Youtube game to the next level – it’s good quality audio. There is no point in shooting great quality, well lit 4K and HD video if your audience can’t hear you clearly.
MOVO VXR10 Shotgun Mic – this is my new favorite microphone for compact cameras. It’s small, inexpensive, and delivers great sound quality.
It doesn’t require its own batteries, as it draws power from the camera. This has both advantages and disadvantages.
The main disadvantage is that it’s not going to be as good as larger microphones with their own battery power.
It will also eat up some of the M50’s already paltry battery life. (Also why I recommend at least 1 original Canon battery + two third party batteries).
But to me, the advantages outweigh these disadvantages.
No, it’s not what I would reach for if absolute sound quality is the goal, but for run and gun, everyday shooting with my kid, this is a lot more fun to use than a larger mic.
The big advantage that a mic that draws power from the camera, for me, is that you don’t need to remember to power it on. Believe me, there is nothing more frustrating than coming back to find out you don’t have audio all because you forgot to turn on your mic.
That, and the small size and portability are why I think small, camera-powered mic’s are better for most uses.
Rode Videomic Pro – long been a favorite of Youtuber’s and content creators, this mono directional shotgun mic is another compact and light option.
It’s not as small as the MOVO microphone above, but that’s because it’s a step-up in quality and requires its own 9V battery.
NOTE: A battery doesn’t come in the box, you’ll have to purchase it separately. Also, it isn’t always obvious where you put the battery – the battery door is on the front of the mic, it’s the small plastic with a gold dot. You open it by pushing up, towards the mic itself.
I know it’s a bit of a pain to put in the battery, and it would be better if it used more common AA or AAA batteries, but a single 9V battery can last for up to 70 hours of use. So it’s worth the hassle 😉
This is still a very light microphone, clocking in at a mere 120 grams with the 9V battery.
Overall, this is a great option for capturing and isolating audio in places where the internal camera mic would’ve just jumbled everything together (up to around 12 feet, in front of the mic).
Sennheiser MKE 440 Professional Stereo Shotgun Microphone – this one is a unique microphone that’s best suited for home studio use.
It’s a shotgun microphone, but it’s not mono, it’s a stereo microphone.
Unlike the usual XY configuration of other camera-mounted stereo microphones, Sennheiser chose to go with a unique (and bad-ass looking) V-shaped stereo configuration.
This has two mini shotgun microphones, aligned and matched to allow for capture of stereo width capture.
This design makes the Sennheiser MKE440 one of the more compact stereo on-camera microphones out there.
You won’t see a shockmount when just looking at the mic, but don’t worry, the two mini microphones are actually shockmounted inside the case.
This is a great mic for talking head videos and two-people interviews. It’s really fantastic at eliminating room echo.
It’s effective at cutting out sound from the sides, but doesn’t eliminate it completely. Let’s say you’re at a dinner party, and want to record someone speaking, this mic is going to do a great job picking up their voice, without completely eliminating the ambiance.
Overall, this is a great run and gun mic, also great for family videos. It’s small and light, and punches well above it’s price.
NOTE: This mic uses 2x AAA batteries, not included in the box. The great thing is, the batteries last for about 100 hours of use.
LED Video light for Youtube Videos
It doesn’t matter if you’re doing it for vlogging, for Tik-Tok or the ‘gram. Great light is a must for any kind of video creation.
It doesn’t matter if you’re not looking to become the next big influencer, if you’re doing any kind of video – whether you do make-up tutorials or unboxing videos, the thing that always sets the best apart are good audio and good lighting. Repeat after me – mics and lights!
You don’t need anything fancy, you just need to make sure you get something portable and easy to use.
Best Rig Light (or on-camera lighting)
Viltrox L116T Super Slim Bi-Color LED Light Panel – this is a great, inexpensive light that’ll give you a lot of bang for your buck.
With 116 lights, capable of outputting 987 lumens (max.), and a 120 degree beam angle, this can take care of a lot of your content creation needs without dropping more $$$ for expensive lights.
It features a small LCD display showing you the current light intensity, temperature and battery percentage. Not only is this great for dialing in the exact settings you want, but if you have more than one of these set-up, you can VERY EASILY duplicate your settings across each light. Hallelujah!
Although it’s small for what it is, this is still not what I would call a small light. In my opinion, this is best used off-camera, but it’s not heavy, and relatively small enough that you can occasionally use it on-camera if needed. (If you want something really small and portable, look at the Aputure light, below).
But, this is really fantastic if you want something no-frills and easy to use. Being able to quickly dial in your desired brightness and temperature is already worth the asking price.
If you want something powerful, yet somewhat portable, without breaking the bank, this is one of the best lights you can get right now.
NOTE: Some places sell the light only, without an included battery or charger. So make sure you get the correct one. The one I linked to includes 1 FP-550 battery and charger. If you need continuous power, you can also power this light with a 12v AC adapter (purchased separately).
Aputure AL-M9 Amaran LED Mini Light – if you want something that is absolutely tiny, this Aputure light fits in the palm of your hand and is pocketable.
It’s one of the thinnest on-camera LED lights I’ve ever seen. At a mere 140 grams and 11mm thick, it’s like a stack of credit cards or a thin smart phone.
Despite the tiny, pocketable size, this light manages a 120 degree beam angle, which is impressively wide for such a small light.
This is made possible by 9 bulbs, capable of outputting a max of 900 lux. That’s not bright enough to light an entire room, but you can’t really expect it too at this size and price.
Instead, it’s great as a fill light. It provides a nice, soft spread for about 7 feet. Great for interviews, and run and gun shooting. Great for product photography, for adding a bit of catch light to subjects’ eyes and for finer control of shadows.
Aputure managed to add a built-in 1800mAh rechargeable lithium battery that runs up to 1.5 hours on full power, or 13 hours at minimum brightness.
All in all, this is a crazy simple, easy to use light. You’ve got the on/off switch, a micro-USB charging port, and the dimmer controls (9 levels).
But despite the simplicity, this is an extremely versatile light. It includes a diffuser and CTO and CTB gels, and aside from the ¼” mounting screw thread, allowing for mounting on tripods or light stands, you can also easily attach this to various surfaces using adhesives because it has a smooth back. Because it’s so small, it’s easy to hide and just use gaffer tape to stick it in tight places.
If you value portability, having even two of these in the bag is going to be a hell of a lot more convenient (and versatile) than one big light.
Best Ring Light
MACTREM 6” LED Ring Light – small and simple, very easy to set-up. This is a great starter light for beginners.
If you want something inexpensive and portable, this is a great choice. It’s easy to put together and take apart, and can easily fit in a small backpack.
The included tripod is small and doesn’t extend, so this is really more for table top use. So, that means it’s not great if you want something that will extend without a table, but the upside of a small ring light is that it’s easy to store or to travel with. There is a ¼” screw on the bottom, for attaching to a full sized tripod, if you have one.
It uses a USB cable, so you can easily plug it into a portable power bank or your phone’s charger.
Overall, if you’re not sure what you need yet, and don’t want a large and complicated light set-up in your bedroom or living room, this is a great light to start with. It’s great for live streaming, make-up videos, talking head videos and the like.
Neewer 18” Ring Light – if you have the space and are less concerned about portability, and more with lighting up a larger area, this 18 inch light from Neewer is a great step-up from the smaller MACTREM light above.
Not only is this light 3x larger, it also comes with its own light stand, which extends from 19 inches to almost 5 feet. It’s still fairly compact, considering it’s an 18-inch light. It’s got a small footprint, and will have no problems fitting in small living rooms or studios.
The benefit of a larger light (e.g. this 18-inch vs the 6-inch light above) is that you can light more than just head shots. A larger light also produces softer light, with less of a harsh spot light effect.
The great thing about this Neewer light is that it’s very easy to dial in the brightness. It includes a knob that allows for stepless dimming of the LED lights. Way easier and allows for finer control vs using buttons.
Unlike the smaller MACTREM light above, you need to have this plugged in to a wall socket, it won’t work with a power bank.
IMPORTANT: The light comes with a small ballhead, good enough for the M50 and the kit lens, but for anything else, you really must use a separate tripod or a gorillapod (see below). It’s a tiny ballhead that’s not designed to carry a lot of weight.
Gorillapod
Gorillapods are great compact tripods, very useful for a variety of situations. It’s not a replacement for a real tripod, especially for landscape use, but they are infinitely more portable and they can also do things that regular tripods can’t – like attach to posts, branches, fences etc..
Their small size and flexibility cannot be emphasized enough – you will take them with you way more than you would a normal tripod.
I recommend the Joby Gorillapod 3K for the Canon M50 when using smaller lenses like the Canon 15-45mm kit lens, or the Canon EF-M 11-22mm wide angle lens.
Although the Joby Gorillapod 1K would technically work for the Canon M50 paired with the 15-45mm kit lens and the 22mm pancake lens, you would need to ensure that the legs are splayed out at their maximum most of the time. To me, it’s just not worth the risk, and you risk wearing out the gorillapod faster too. Just get the 3K version.
If you plan to use EF and EF-S lenses with the adapter, I strongly recommend you step up to the Joby Gorillapod 5K.
CompactShooter.com is a participant in the Amazon Services LLC Associates Program, an affiliate advertising program designed to provide a means for sites to earn advertising fees by advertising and linking to Amazon.com. This means that we get a small commission on products sold through affiliate links at no extra cost to you.
Leave a Reply